A little tutorial how I put together my card.
1. First I die cut the card base (I use my Lifestyle square dies). My card base is 14cm sq (5 1/2'').
2. I die cut first layer with the window. The layer is 13.3cm sq (5 1/4'') and the window is 9cm sq (3 1/2'')
3. Second layer
which will go under the 1st layer is 11.8cm sq (4 1/4'') and the window
is 8.3cm sq (3 1/4''). For this layer I used one side patterned paper
so before cutting the window I have glued under white light cardstock
(about 160g) so the layer will be more solid.
4. This square is a left over from cutting the window in 1st layer. I will use it as a background for my window.
I use dies to cut the windows but they can but cut with scalpel or basic trimmer (not the rotary one).
I use dies to cut the windows but they can but cut with scalpel or basic trimmer (not the rotary one).
I like to shade paper edges with Distress ink (I often use grey ink Pumice Stone).
I
placed the No 4 square in a middle of my card base. It
is easier to center the square (with added glue) by placing it lightly
on the top of a card base and layering the matching frame (first layer) and moving them to find the right position.
When the middle square is in the center of the card base I press it to glue it down and I remove the first layer.
Now the second layer will need to be glued to the first layer.
This is how it looks when both layers are together. (x)
This is the reverse. Next step is to add some 3D foam around the edge of the second layer (3).
Almost
finished card. Now I just added some glue around the edge of the first
layer and removed protective layer from 3D foam so all is ready to glue
down to the card base.
First
I position carefully the center of the card. I have chosen for
the center of the card same patterned paper like the frame (the first
layer) it helps me to place the first layer in the center as the
patterns on the paper match. When it is straight I gently press
the center so 3D foam sticks to the card base. I do not glue the edges
of the card yet. The arrow shows the edge of the card which is still not
glued down.
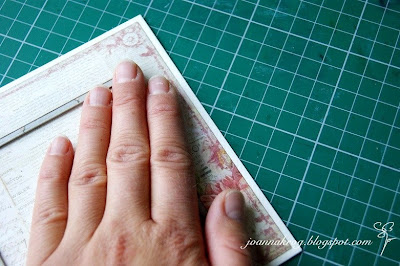
When the center is in place I press the card with both hands and moving gently up and down along the edges so they stick down the the card base.
Finished card with the little window in the center and edges glued flat to the card base.
The card is ready to decorate.
********
(x)
I have also made this way a card with shaker box. For the shaker box in the step (x) I
added acetate (same size like the second layer). I glued acetate on the
reverse of the second layer. And then, on the edge of acetate, all
around, with no spaces in between, I glued 3D foam. I added two layers
of 3D foam so the window is higher and there is more room
for chosen confetti. In this card I added some tiny flowers.
Best regards,
Joanna


It's so easy and beautiful! Thanks for the tutorial!
ОтветитьУдалитьHow simple and beautiful! Thank you! And the flowers - a masterpiece!
ОтветитьУдалитьThat's a fab idea! I love the shaker card !
ОтветитьУдалить